Getting started with SDK Development
As a new SDK developer, it is expected that developer face some difficulties on where to start and understanding the smartview code structure.
So let's start with baby steps. We'll go through some of our packaged samples that address some common use cases and after that we'll try out related option from workspace assistant to generate boilerplate code.
This is a good way to get familiarized with the smartview code structure as well as SDK capablities.
Hope the development environment is ready. If not, refer setting up development environment before we start.
Customizing landing page
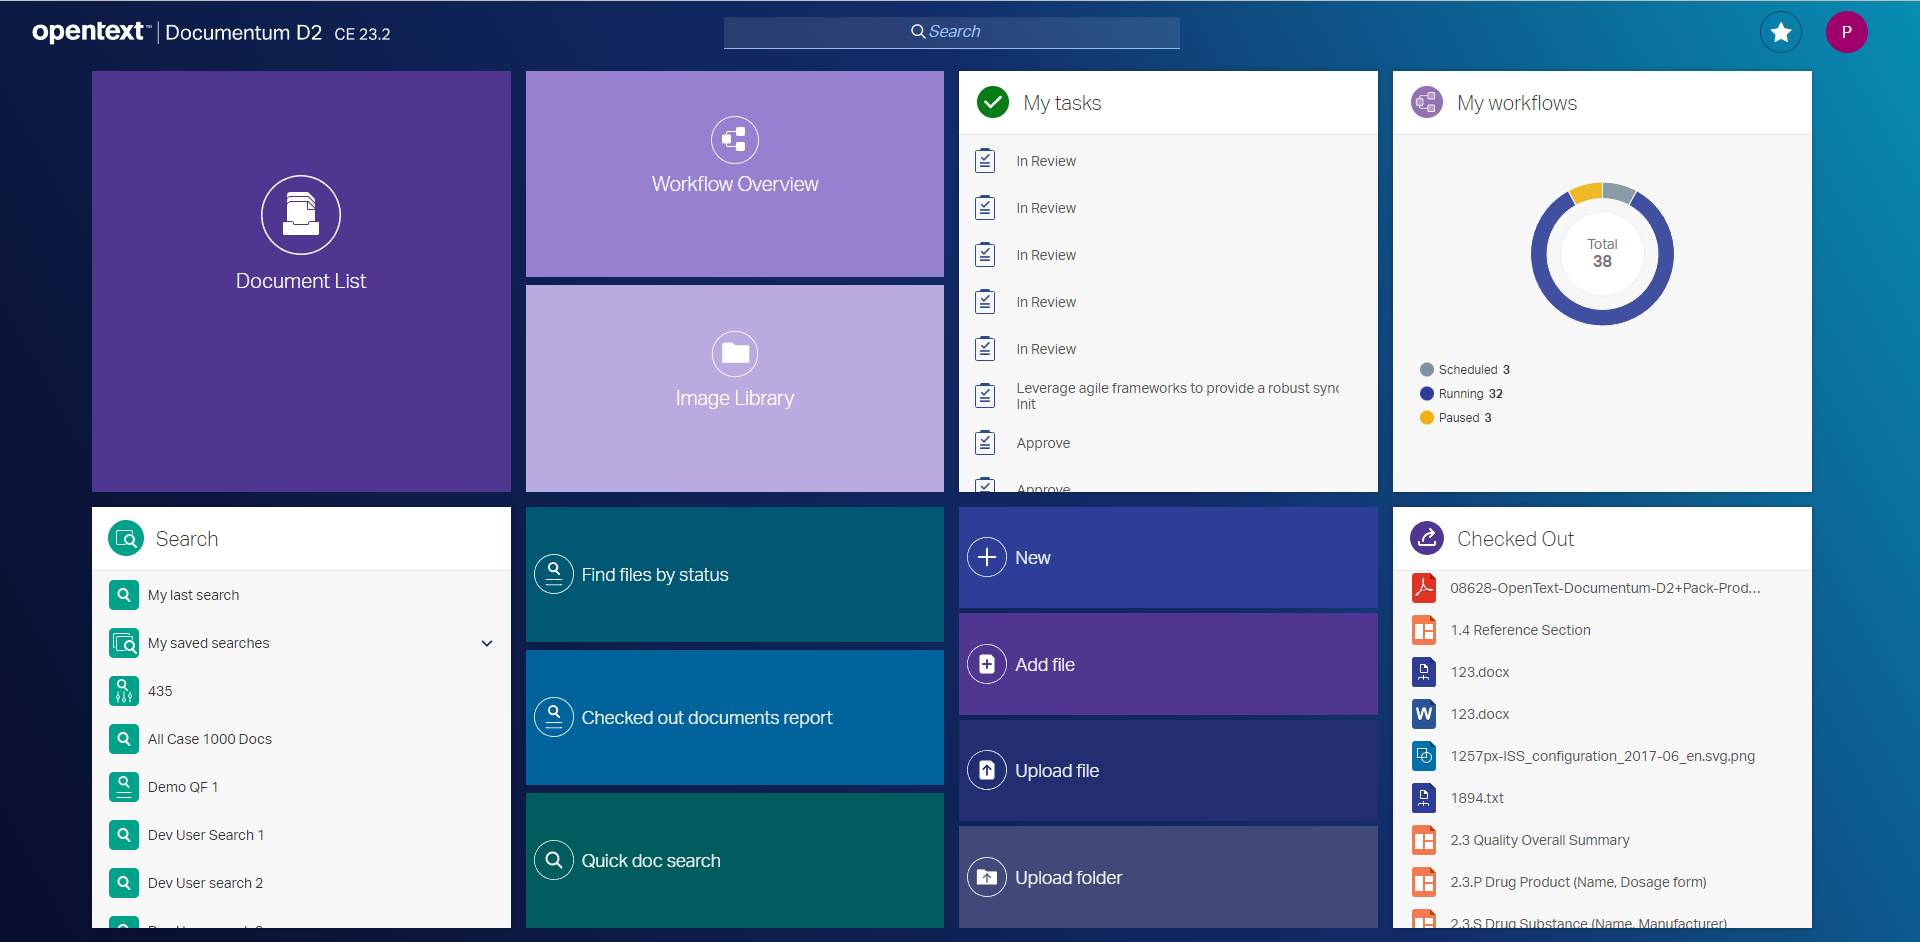
A simple D2SV landing page consists of shortcut tiles like Document List, Add File, Workflow Overview etc and list tiles like Checked out, My tasks etc and looks like:
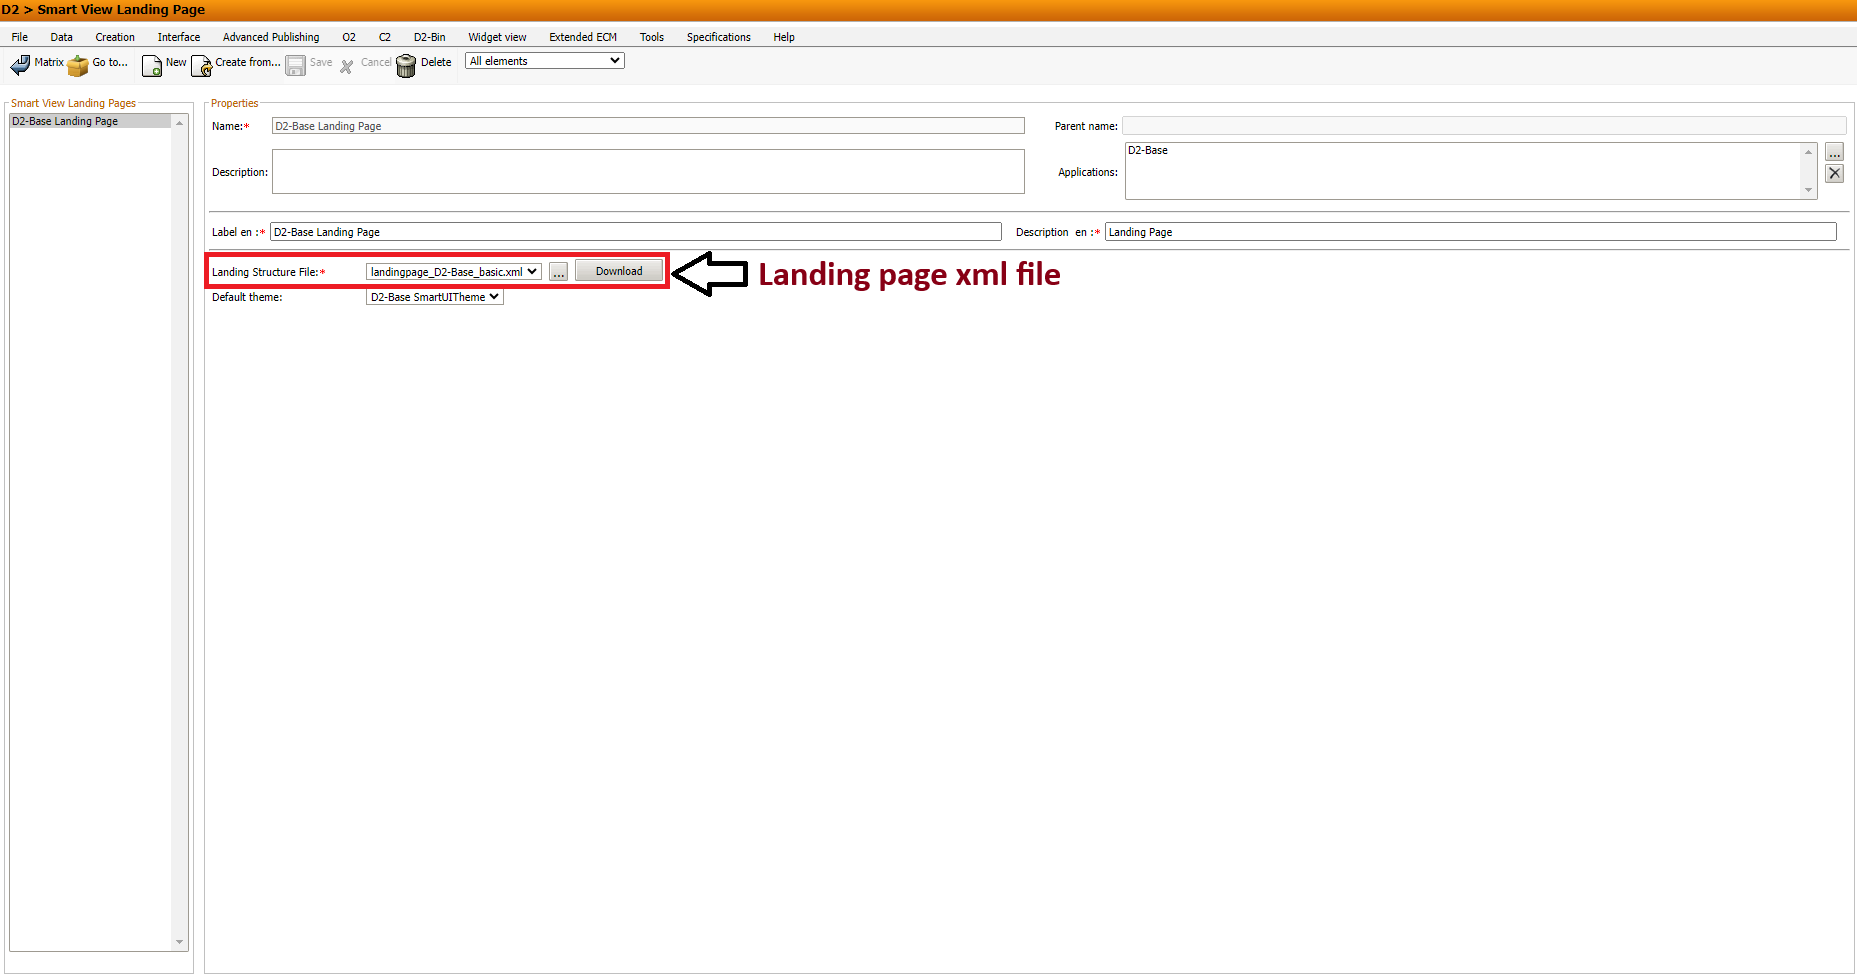
The tiles to be shown and their layout can be controlled by admin users through landing page xml file under Widget view -> Smart View Landing Page toolbar menu in D2-Config:
Shortcut tile
A shortcut tile when clicked can be used to open a dialog or new view or an external URL.
Through SDK, an SDK developer can create custom shortcut tiles for their intended action, i.e, to execute a simple click event handler(inline handler). A more complex logic can be implemented using a shortcut behavior.
A shortcut tile can be used to expand to a new view within application (application scope perspective) like the doclist widget.
A good example to refer and try out from our packaged samples is D2SV Custom Widget Type Tile.

Now that we have tried out the sample, let's try to add smartview shortcut tile using workspace assistant to create custom widget type and shortcut tile.
Also don't forget to refer how to add custom widget type and update landing page xml file to make the shortcut tile visible on smartview UI.
Related Topics
- D2SV Custom Widget Type Tile
- Add smartview shortcut tile
- Add shortcut behavior
- How to add custom widget type
List tile
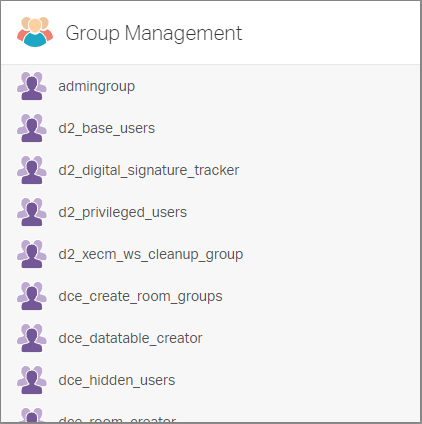
A list tile contains a list of records meeting some criteria, say Checked out tile which shows all the documents that are checked out. The list tile can be expanded to a new view within application(application scope perspective).
A similar example in our packaged samples is D2 Admin-Groups. Trying out this sample is a good way to relate most of the common use cases. But keep in mind this sample covers other topics like perspective, REST controllers, menu commands and dialog. But we'll try to go step by step on how to get started.
Follow instructions to try the sample.
After trying out the sample, it is seen that a new admin groups list tile appears on the landing page and on clicking the header it expands to a new view within application(application scope perspective).
Now let's go through the associated files for the list tile and understand the views, models and collections used to show the contents of list tile.
Now that we have gone through the associated files for list tile, let's try to add a list tile using workspace assistant and while creating the tile, select the option to expand to a new perspective.
Since we'll be referring the admin groups sample for other use cases like perspective, dialogs and menu, before we proceed to next topics it is good to go through the source code structure for the admin groups sample.
Related Topics
Application scope perspective
A perspective in D2 Smartview is loosely defined as something similar to a web-page in case of multi page web application. A perspective renders a view of semantically similar data with relevant UI controls and interactions to operate on the data. D2 Smartview switches from one perspective to another based on user interaction.
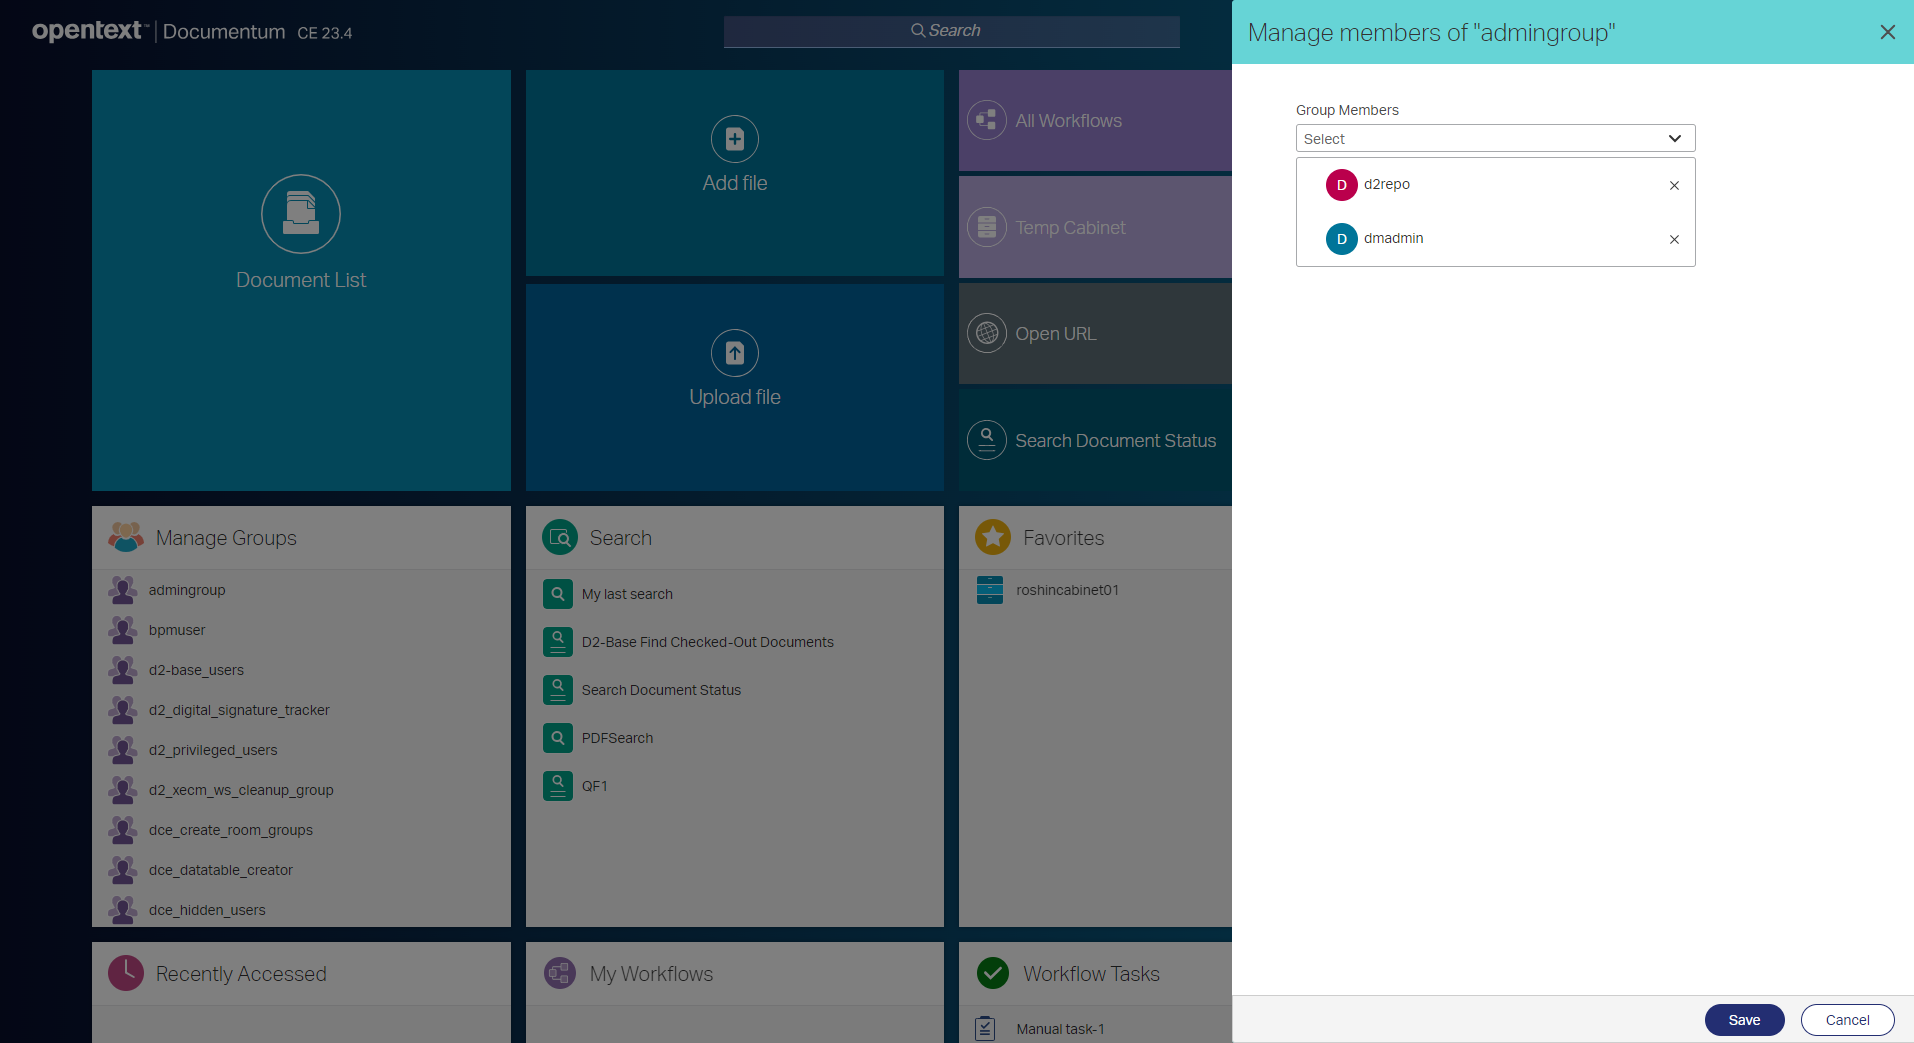
In the admin groups sample, When the header of admin groups list tile in landing page is clicked it opens a new view (application scope perspective) as in the below image.
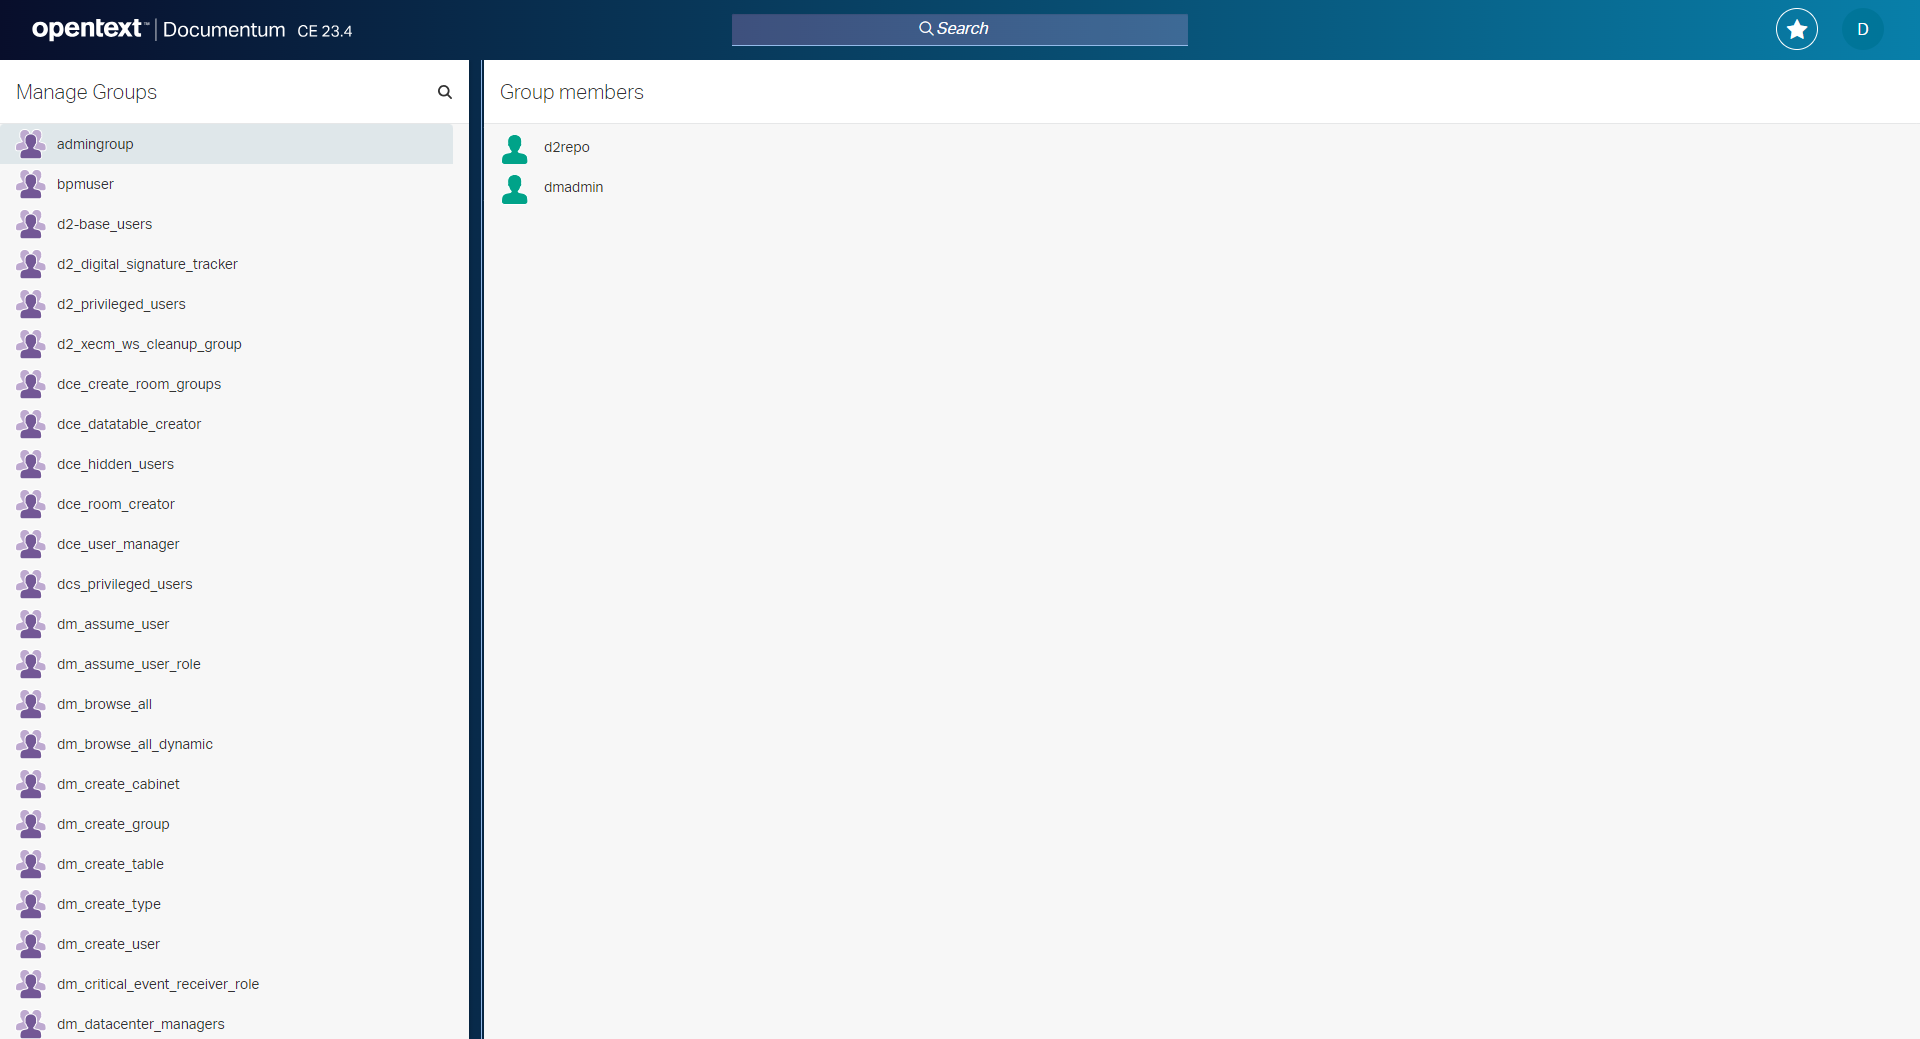
If we check the url for this perspective, it would be similar to the below. This url could be used to directly navigate to the admin groups perspective
![]()
On the left side, we have a view similar to the list tile view in landing page. On clicking an admingroup model from the left side panel, it displays the list of users/groups which are part of the selected admin group.
Now let's go through the associated files for the application scope perspective and understand the views, models and collections used to show the contents of this perspective.
In the previous section, when we created a list tile, we have selected the option to expand to a new perspective.
This will be a good time to compare the generated files for the UI part under in our plugin code and admin groups sample.
The smartview UI src codes can be found under src/main/smartview/src folder for the corresponding plugins.
Keep in mind that the generated boilerplate codes from workspace assistant will be having minimal code and that it is upto the SDK developer to add the custom logic inside it.
Related Topics
REST controller
Now that we have a list tile which expands to a new application scope, let's say we need to define our REST controllers to get data from or send data to database.
If we check in our admin groups sample, from the smartview UI itself it is clear that we require some REST APIs to get the list of groups.
Like any REST APIs, we'll have a controller class with request mappings, params arguments and a manager class to execute the logic to fetch or save the data.
So now let's go through the associated files for the REST controller for admin groups sample.
To begin with, let's check the code for AdminGroupsController.java in admin groups sample.
There is a getGroups function with request mapped for GET method for
/admingroups/groups REST endpoint.
This method then calls the getGroups method of
AdminGroupsManagerImpl.java to fetch the list of groups.
Now that we got an idea on REST controller and associated files, let's try to add a REST controller for our plugin project.
Related Topics
Menu Command
In the admin groups sample, in the smartview UI, for each group listed in the tile, when we hover, we get a menu action to manage the groups. On clicking the menu action, we get a dialog to manage the groups.
An SDK developer can introduce new menu command by doing the following steps.
For this we need a menu config xml file to be added
src/main/resources/xml/unitymenu/<context_menu>.xml. The translation strings related to this
menu should be added in a properties file
src/main/resources/strings/menu/<context_menu>/<context_menu>_en.properties.
Now when smartview UI fetches the menu actions, the new manage groups menu item will be available to the UI.
Associated commnad logic that gets executed when this menu is clicked
can be seen in src/main/smartview/src/commands/manage.group.js.
This is a good time to go through the associated files for the manage groups menu command.
Also refer how to use delta menus in D2.
Related Topics
Dialog
To understand how the dialog is shown here, go the execute method of manage groups command file src/main/smartview/src/commands/manage.group.js.
Here there is a reference to manage groups dialog that gets opened when we click the menu button.
src/main/smartview/src/dialogs/manage.group/manage.group.dialog.js.
This will be good point to start debugging on manage groups dialog. For reference, go through side panel dialog section from admin groups sample.
Related Topics
Additional options to try out in workspace assistant
Let's try some other options given by workspace assistant that generates boilerplate code to the plugin. After building the plugin and deploying the jar file, the corresponding changes can be seen on smartview UI.
Add D2FS Dialog
Let's try out the custom dialog sample from our packaged sample first. Trying out this sample should be fairly straight forward. After deploying the custom dialog sample plugin, when we select a document, folder or cabinet in doclist, we get a new menu to show advanced properties on smartview UI.
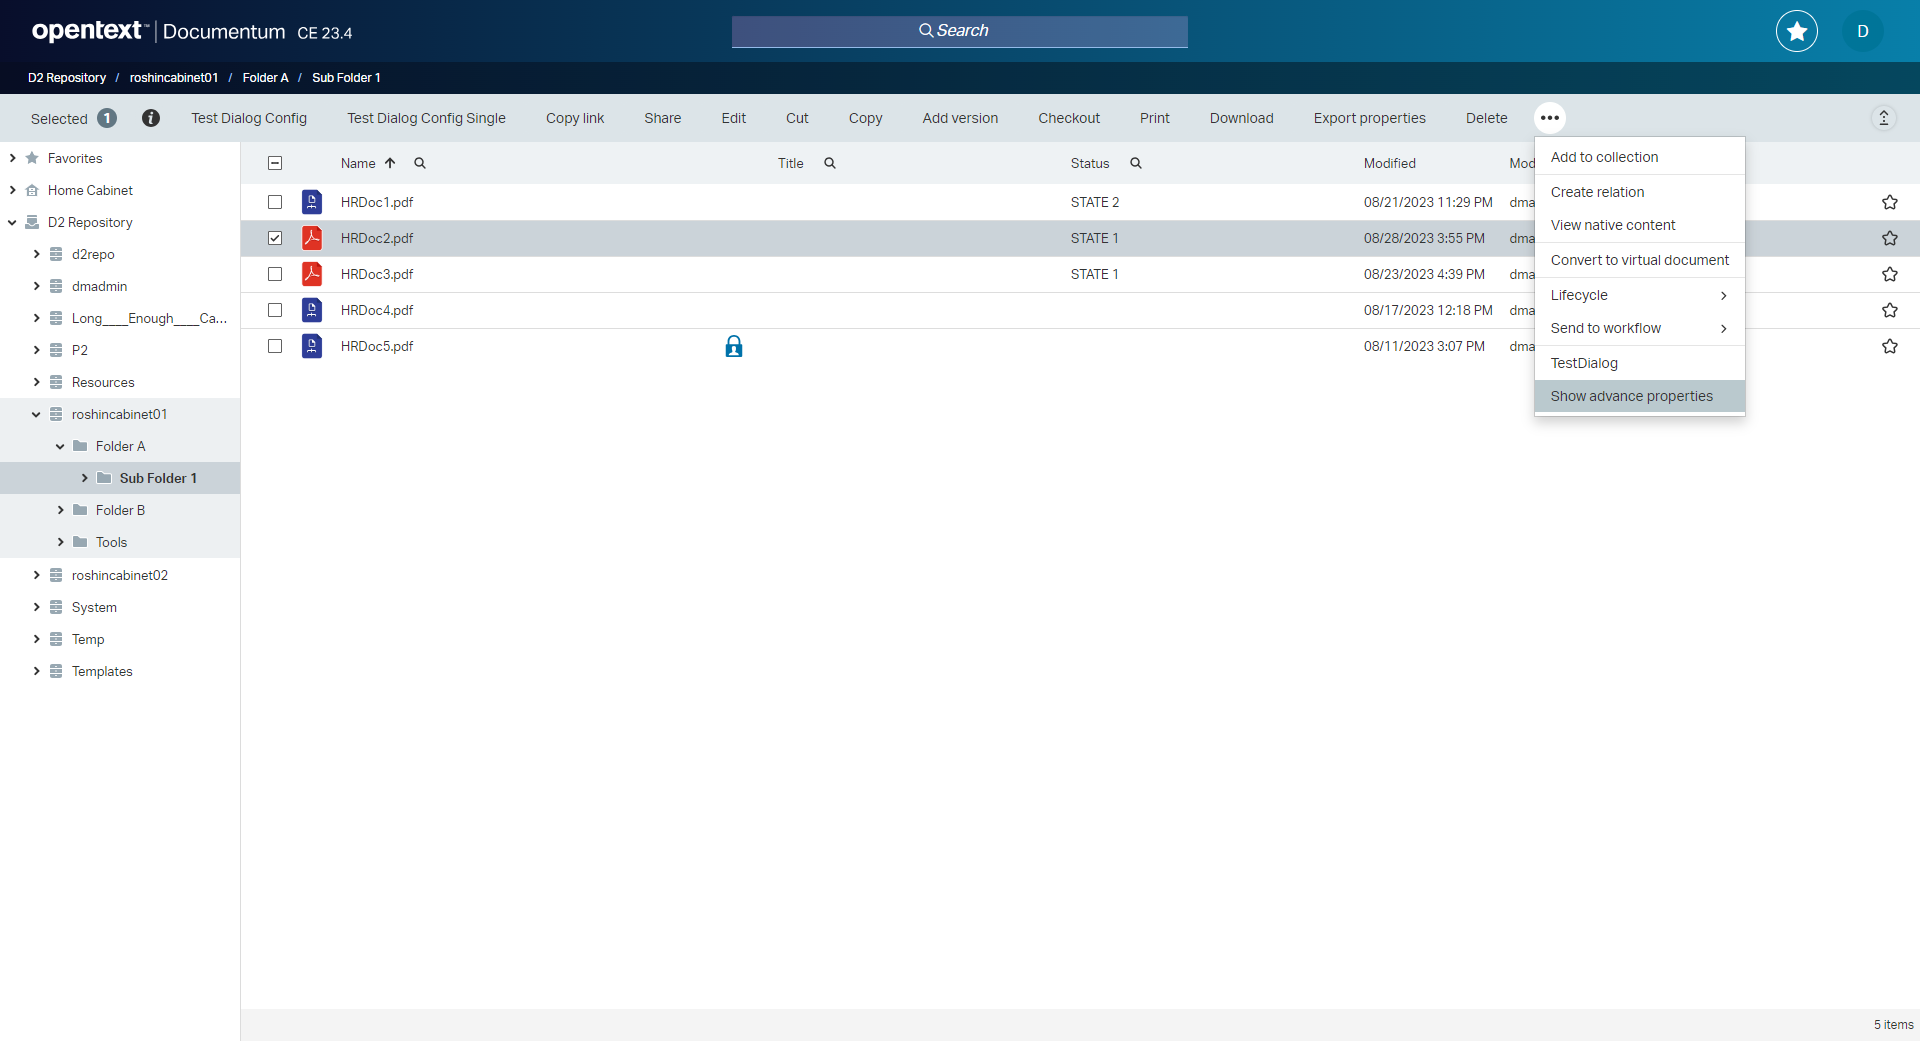
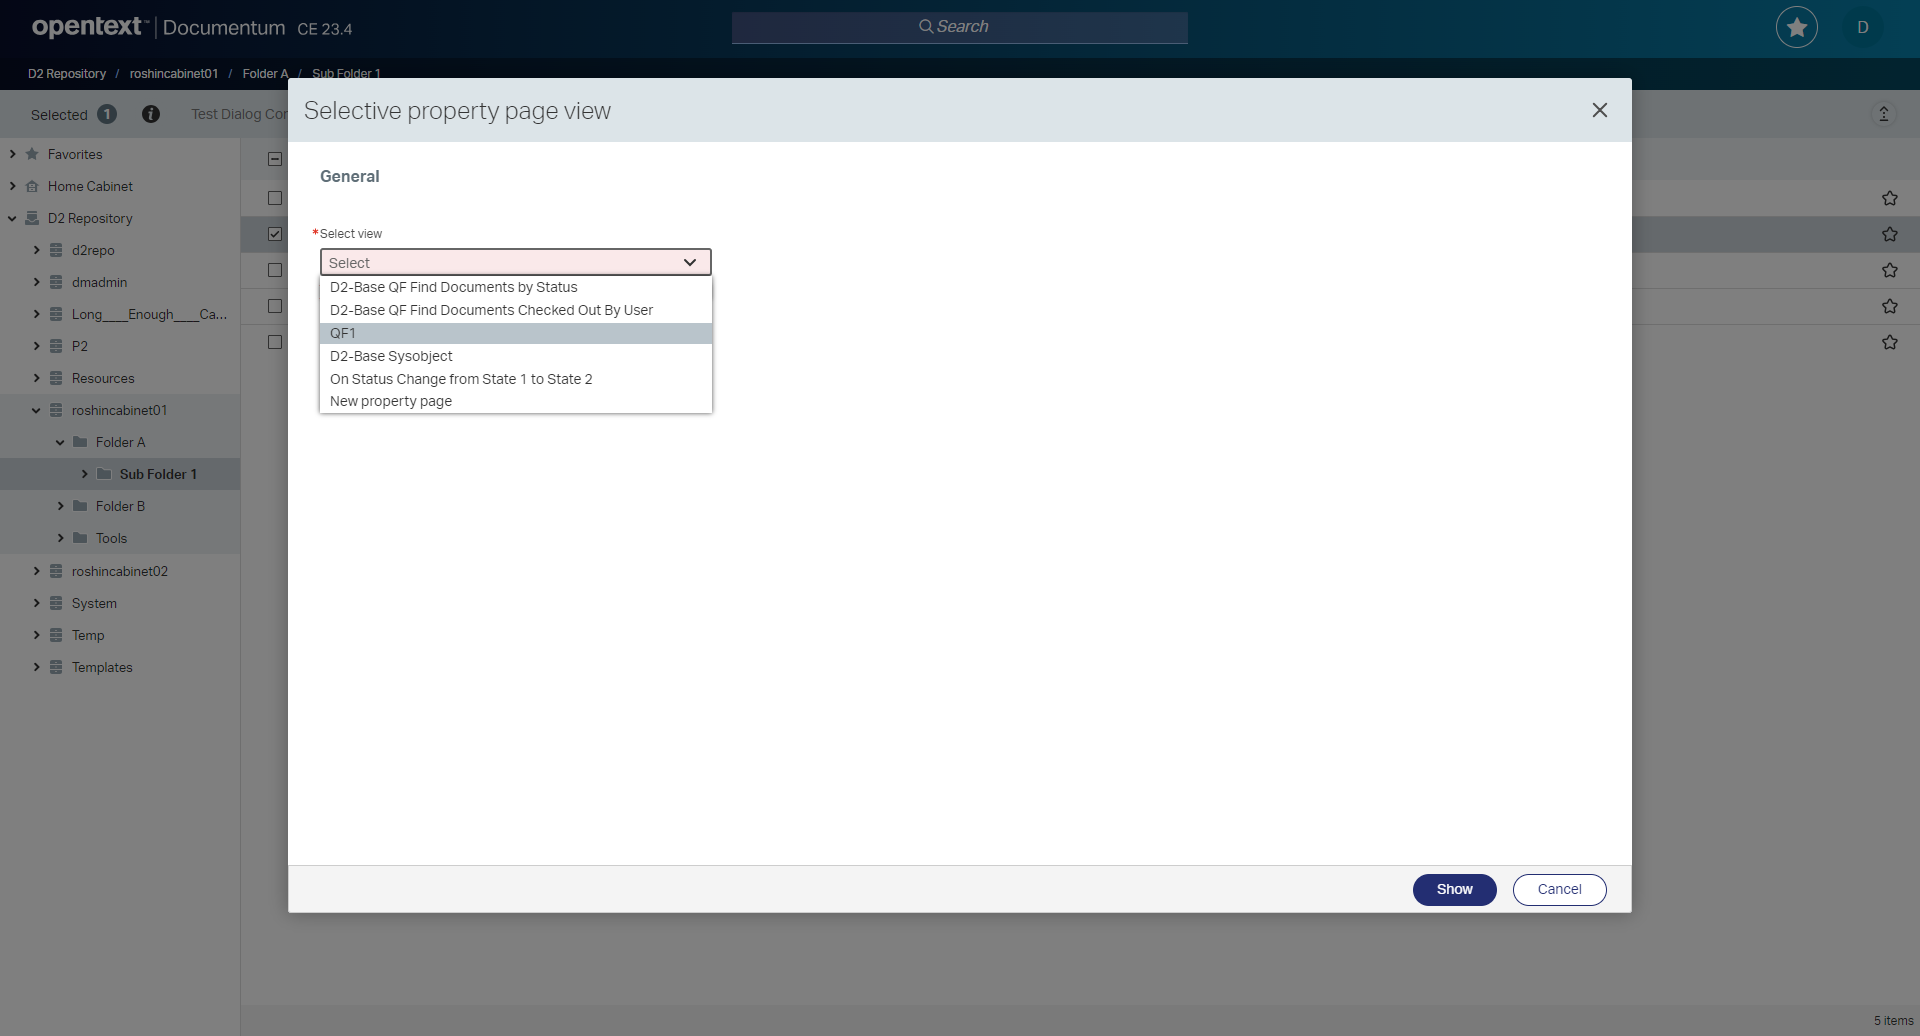
When this menu is clicked, a dialog opens and prompts user to select a property page config from the list of available property page configs. On selection and clicking on the OK button, it displays the properties for the object based on the selected property page config.
Let's analyse the code structure for this use case now. As seen for the manage groups menu in admin groups sample, here we need a menu to open the dialog.
The menu delta xml file can be found under
src/main/resources/xml/unitymenu
For reference, go through menu config files in custom dialog sample.
Like the menu delta xml file, a dialog definition xml file for selective property display can be found under
src/main/resources/xml/dialog.
For reference, go through dialog definition files in custom dialog sample.
Lets go through the associated java files for the custom dialog sample
An SDK developer can use the workspace assistant to add D2FS dialog to a plugin. So let's try creating a dialog using workspace assistant with a menu option to open the dialog from doclist.
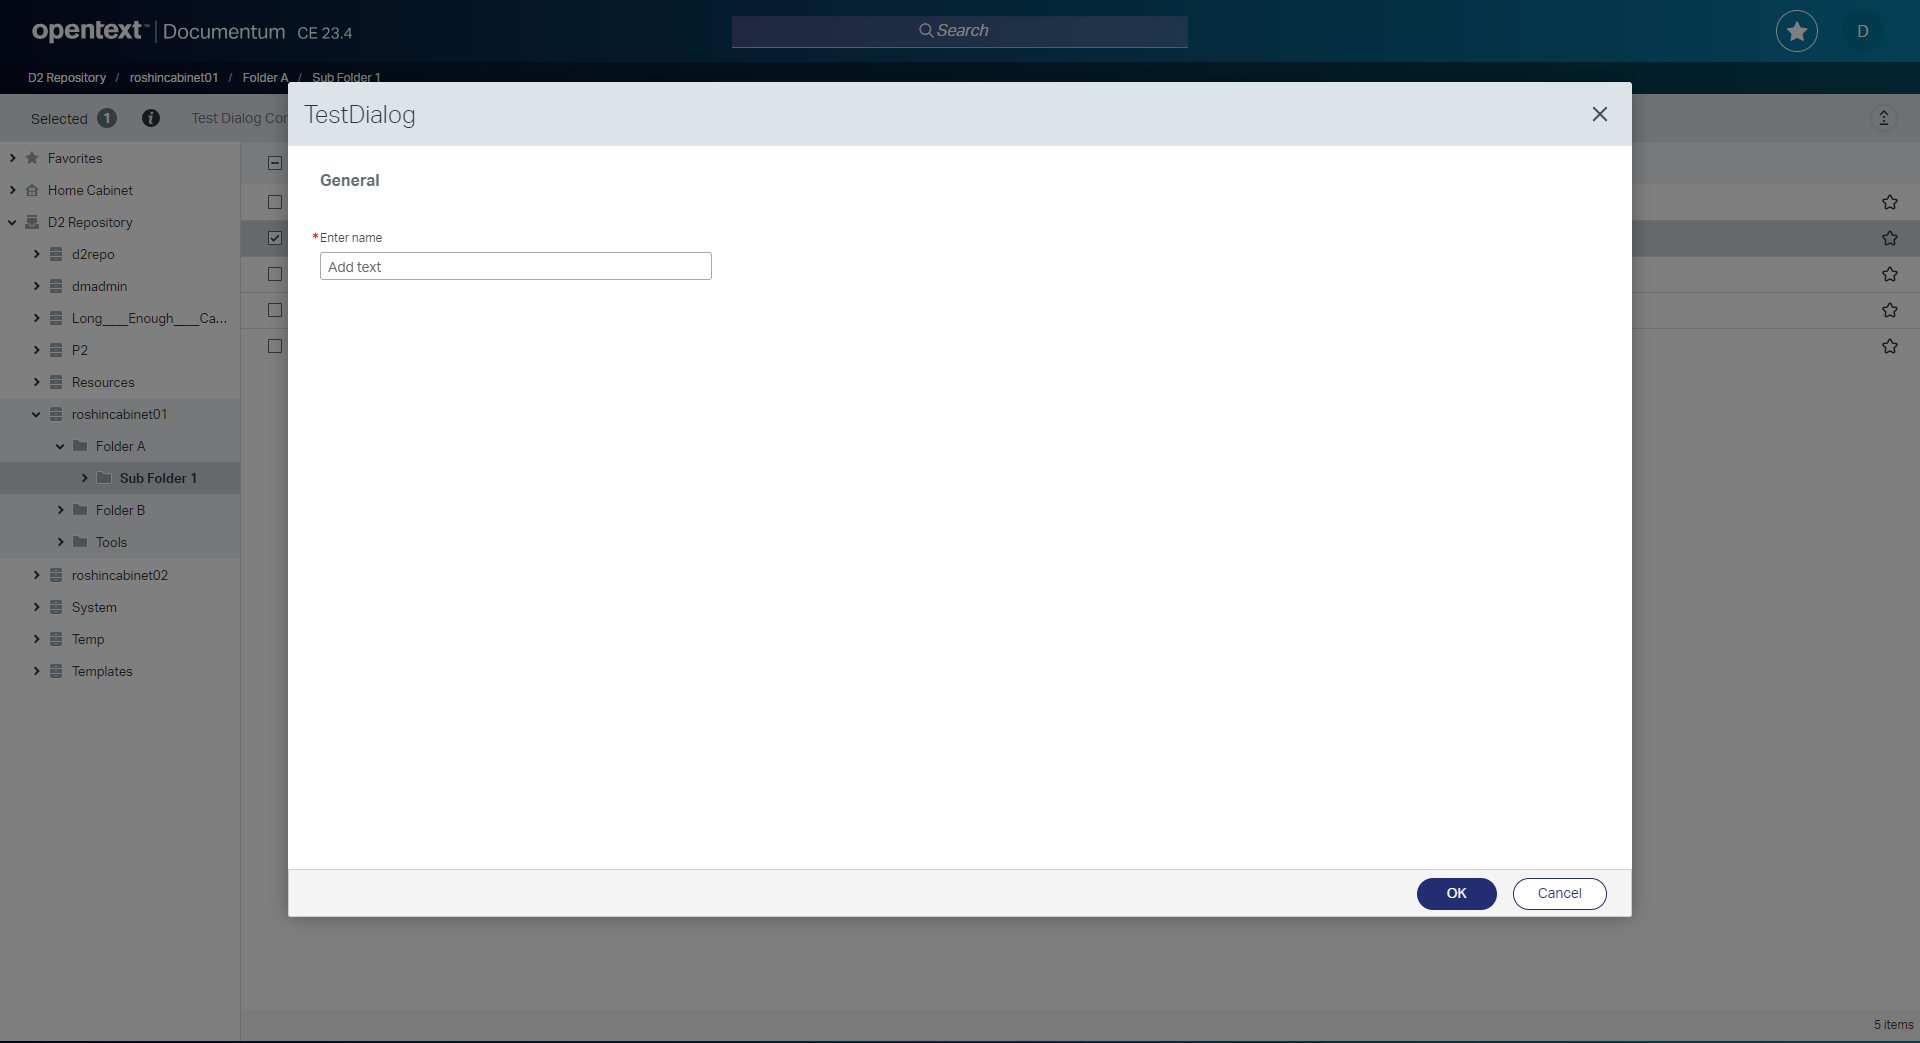
After deploying this plugin, on smartview UI, when we select a document or folder or cabinet, we get a menu to open the dialog we created. On clicking this menu, a dialog opens up with an input text box prompting for name.
A good way to get more familiarized with SDK is by trying out some simple use cases. Now that we have an idea of menu and dialog definition files, Try to change the menu label and dialog titles yourself by updating the corresponding properties file.
Another simple use case to try yourself would be to change the content of the dialog created using workspace assistant.
This can be done by modifying the contents under <content> tag in the dialog definition xml file.
The contents inside <content> tag of dialog definition xml file is similar to the contents under <content> tag
within the <dialog> tag from the xml file generated when we export a property page config in D2-Config.
Let's create a simple property page from D2-Config with a input text field and a combo field without linking to any properties.
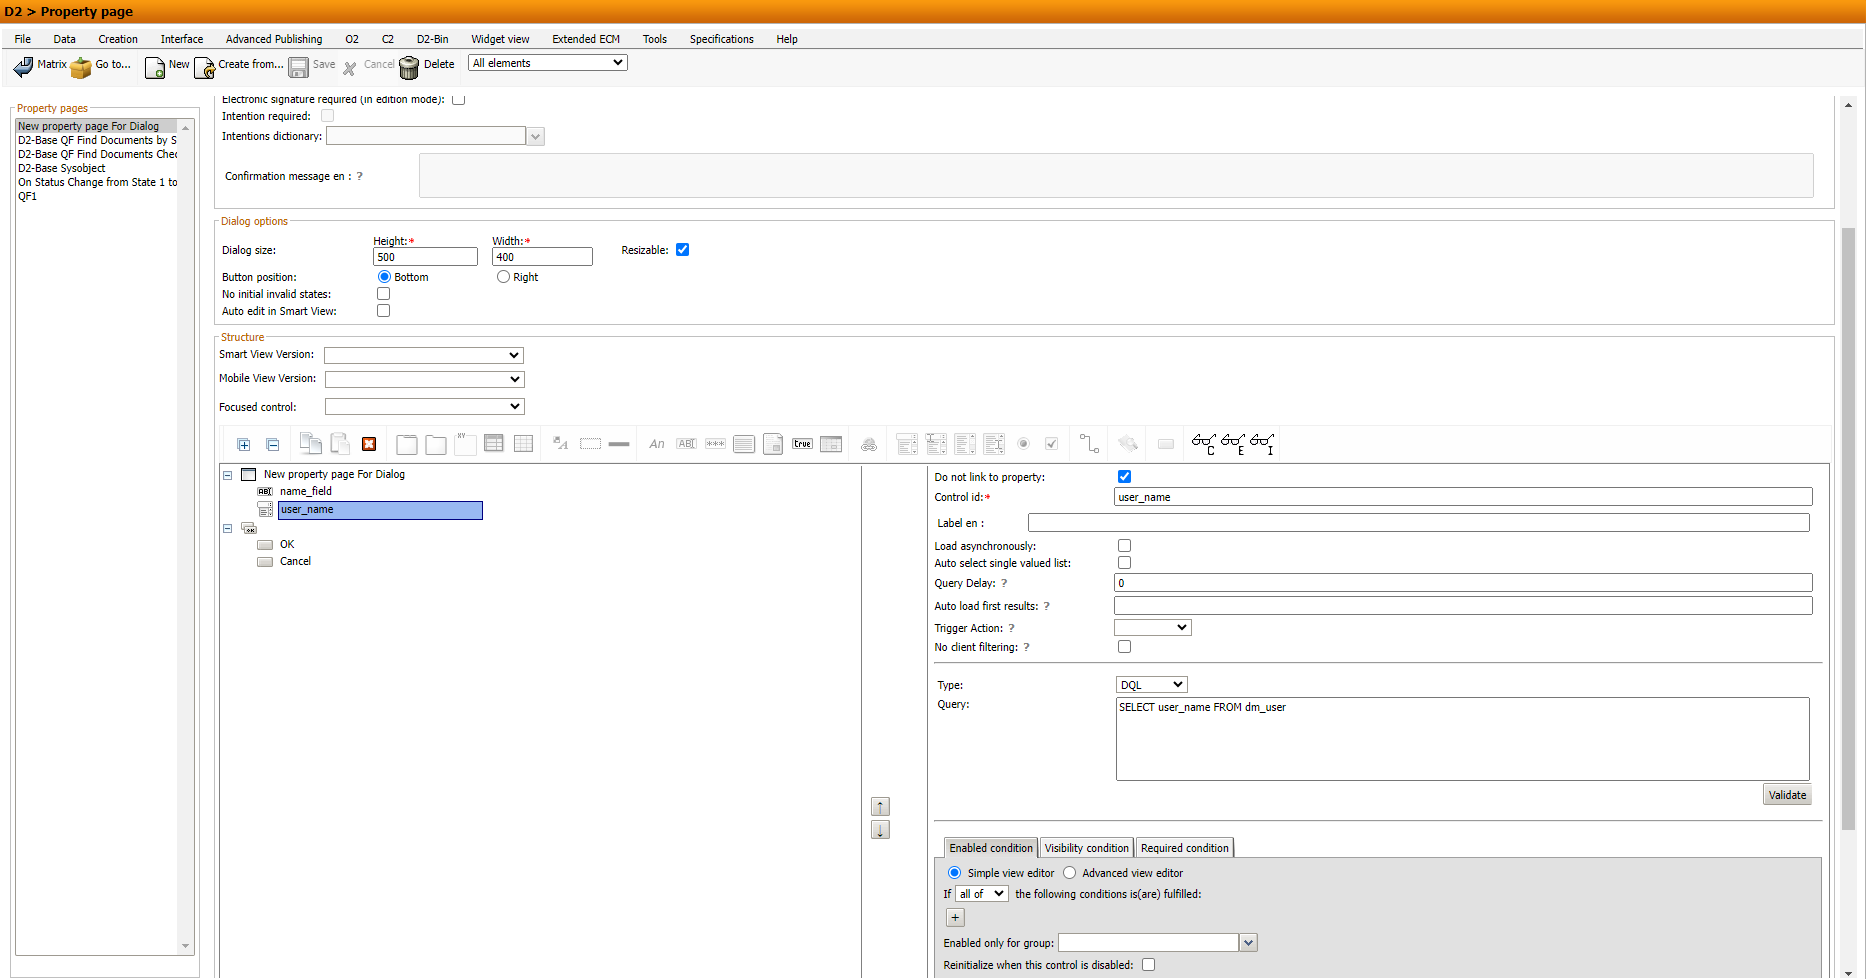
Now try to export just this new property page config and see the contents inside <content> tag inside <dialog> tag
in the generated xml file.

Let's try to change the contents of the test dialog we created using workspace assistant.
For this, first let's go to
src/main/resources/xml/dialog folder of the plugin and open the TestDialog.xml file.
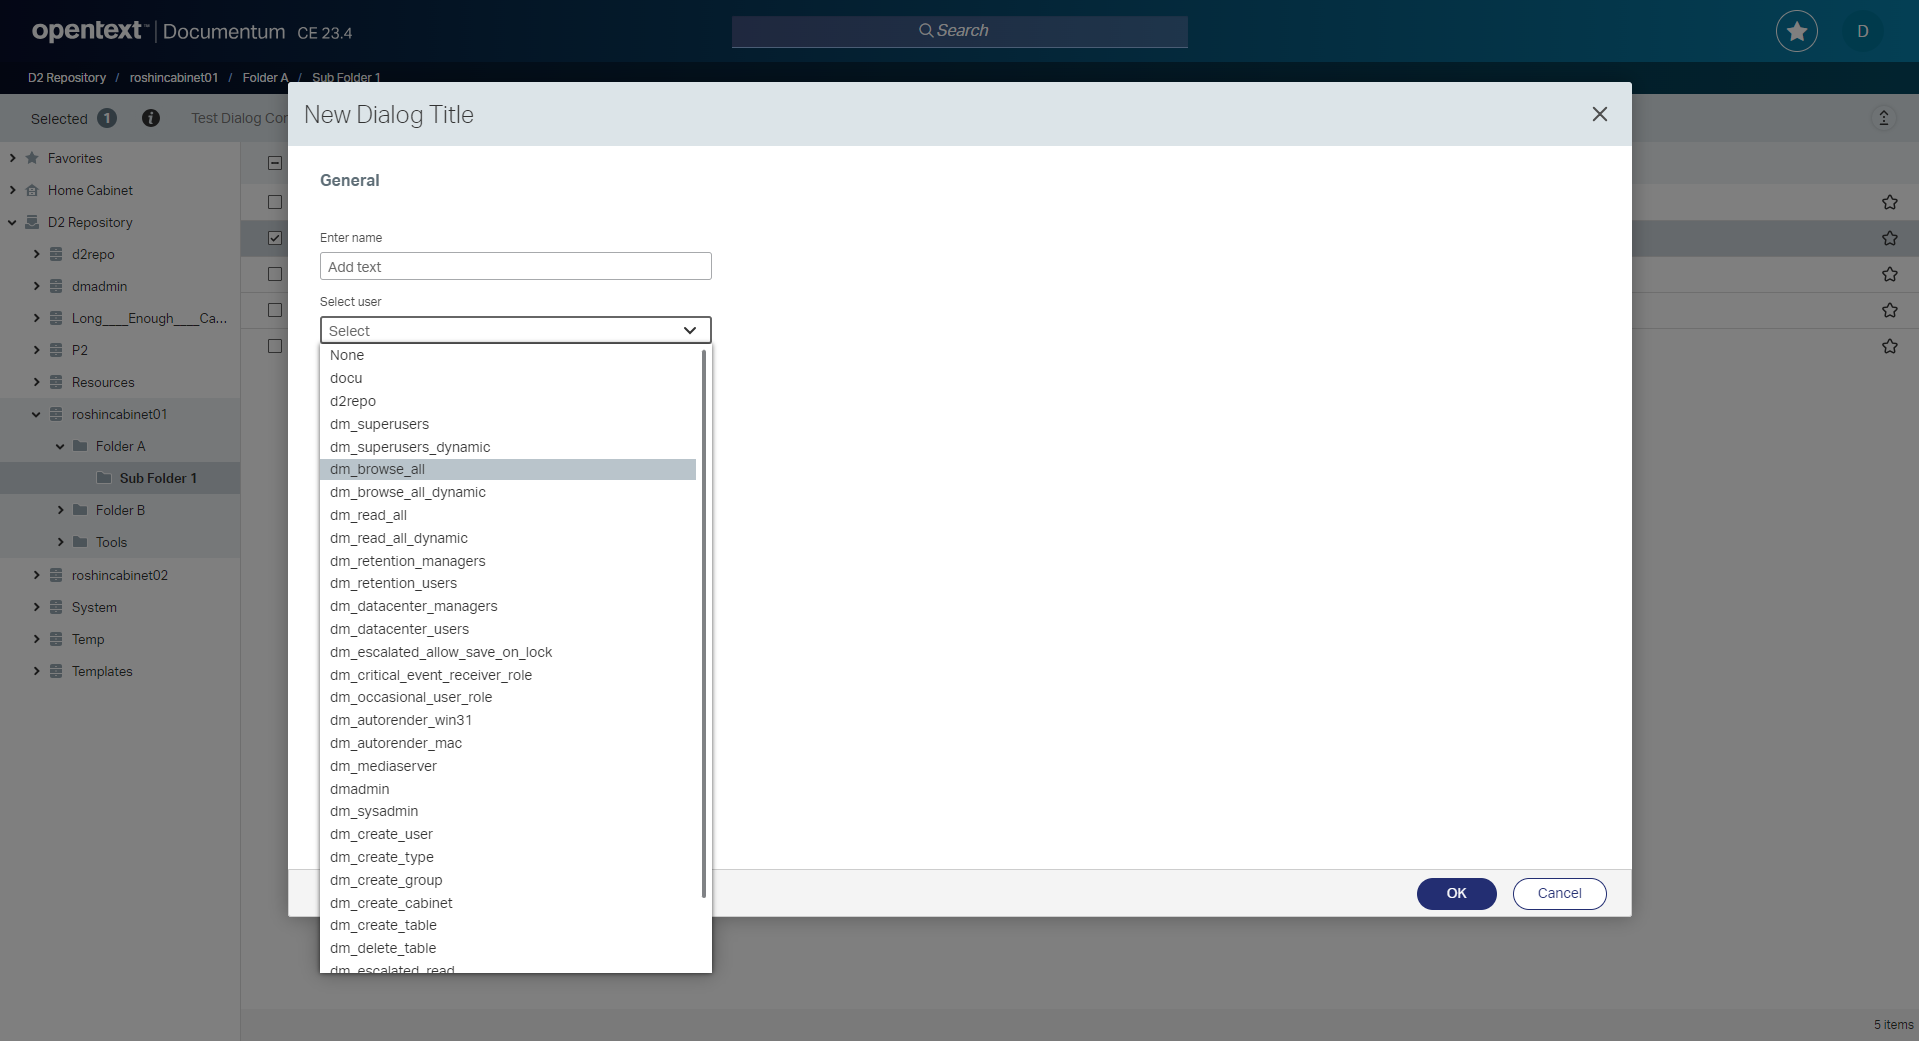
I have commented the existing contents inside <content> tag and added the new contents as in

Apart from this, I have updated the labels in
src/main/resources/strings/dialog/TestDialog/TestDialog_en.properties
file to give a new title for the dialog and label for the new user_name field that is added.
On building and deploying the plugin, the contents of the test dialog should look like the below image.
Optionally, refer custom dialog and how to set form mode for dialog and try to change the form mode selected from workspace assistant while creating the dialog and play around with it.
A good way to learn and understand what happens inside a function is to put log statements and understand the flow.
The log statements in the boilerplate Java classes for dialog will have level set to INFO.
By setting the <root level> to INFO in logback.xml file
under WEB-INF\classes folder of D2 smartview webapp folder in the application server,
these log statements can be seen in D2-Smartview.log file.
Note: Setting the log level to INFO could increase the number of statements that get logged in log file and should be set accordingly post debugging.
Add Metadata View
An SDK developer can use the workspace assistant to add metadata view to a plugin.
After deploying the plugin, a simple hello world metadata view is created and an entry is added to the metadata dropdown to open this view.
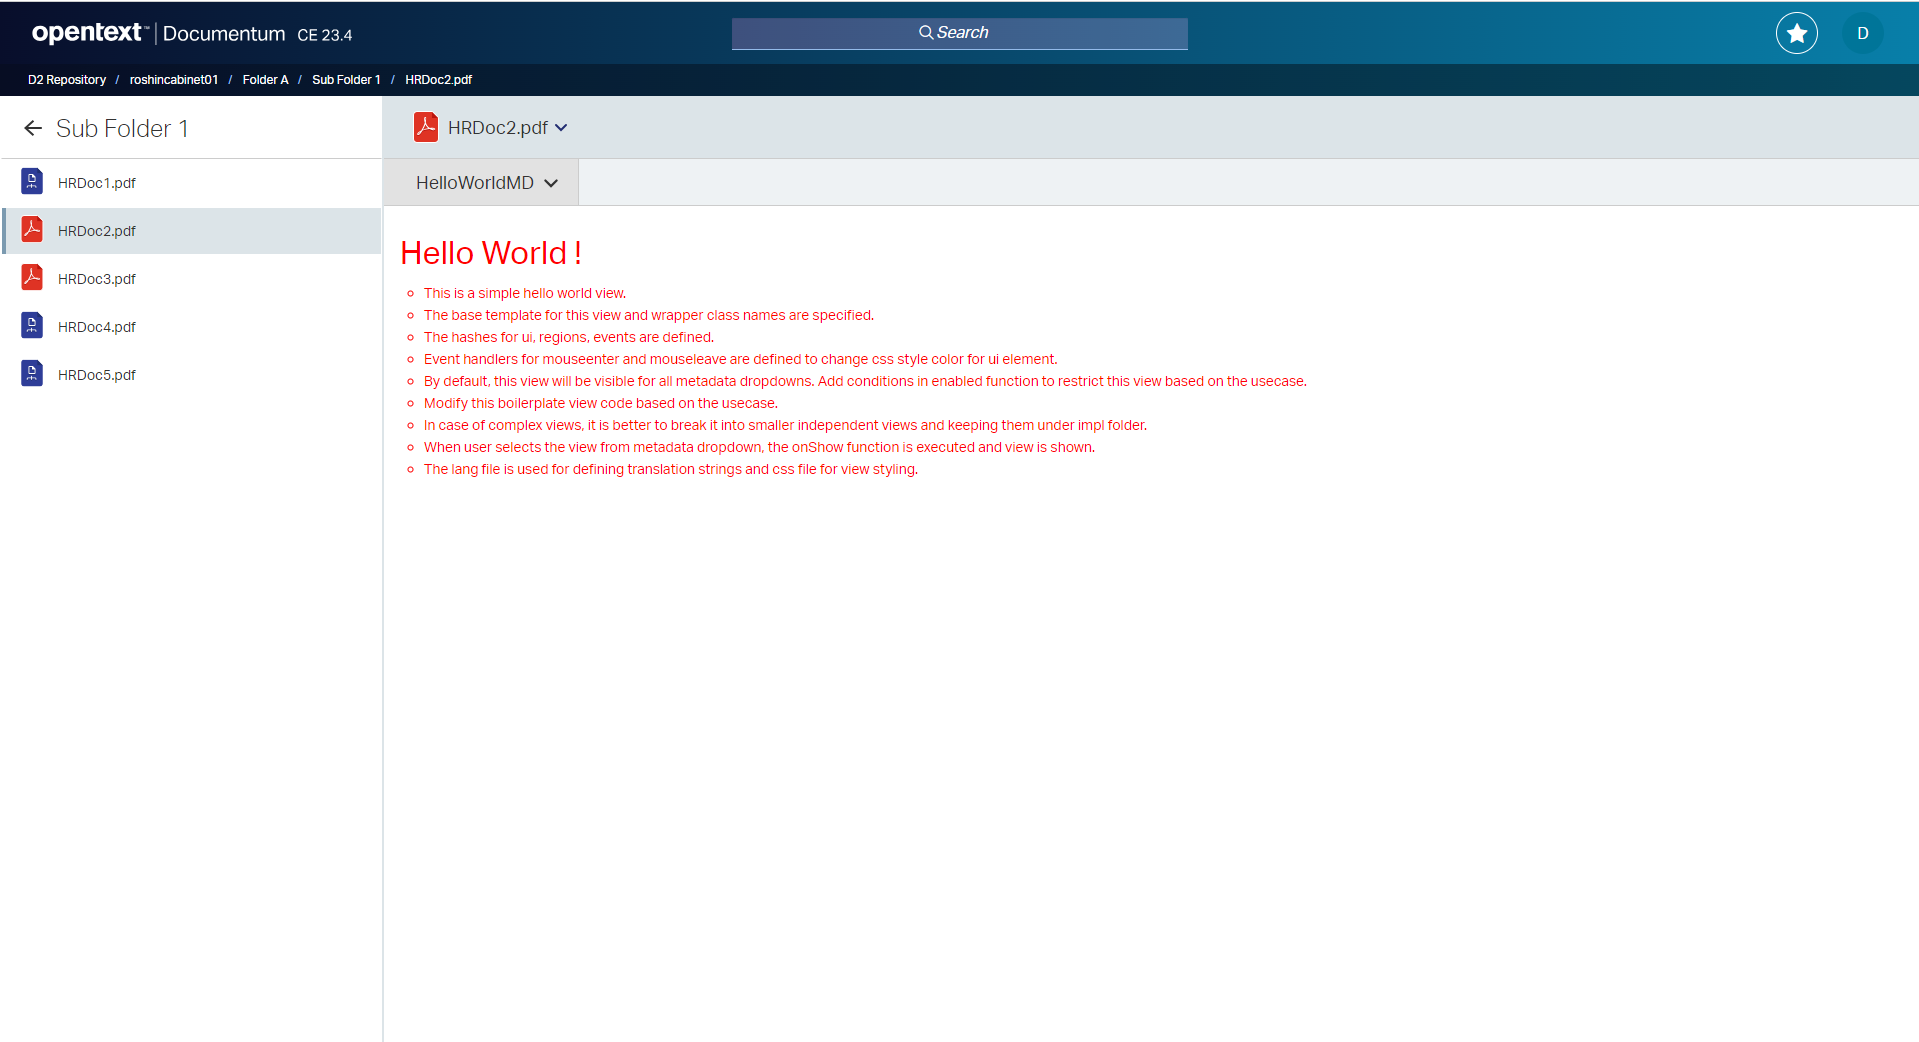
This metadata view js file can be modified to show contents based on the use case.
Also, if this view need to be shown/hidden based on certain conditions, this can be done by modifying the
enabled function in the metadata view js file.
This is a good time to start going through the API documentation. The API documentation gives examples on
how to modify the enabled function, assign sequence number for metadata view etc.
So let's check the API documentation for the metadata panel view.
Inside the metadata view js file, you could see that we have a show view function which shows a marionette item view with hello world text.
Here is an example of how the boilerplate code generated from workspace assistant can be modified to show simple D2 Form
define([
  'nuc/lib/marionette',
  'd2/sdk/widgets/metadata.panel/metadata.panel.view',
  'csui/controls/tile/behaviors/perfect.scrolling.behavior',
  'd2/sdk/controls/form/form.view',
  'd2/sdk/controls/form/form.model',
  'd2/sdk/controls/form/form.converter',
  'hbs!testplugin301/widgets/metadata/panels/helloworldmd/impl/metadata.helloworldmd.view',
  'css!testplugin301/widgets/metadata/panels/helloworldmd/impl/metadata.helloworldmd.view'
], function (Marionette, MetadataPanelView, PerfectScrollingBehavior,
             FormView, FormModel, formConverter, template) {
  'use strict';

  var MetadataHelloWorldMDView = MetadataPanelView.extend({
    template: template,
    className: 'd2-metadata-helloworldmd-wrapper',

    ui: {
      helloworldElement: '.helloworld'
    },

    regions: {
      helloworldRegion: '@ui.helloworldElement'
    },

    behaviors: {
      PerfectScrolling: {
        behaviorClass: PerfectScrollingBehavior,
        contentParent: '.d2-metadata-helloworldmd',
      }
    },

    constructor: function MetadataHelloWorldMDView(options) {
      MetadataHelloWorldMDView.__super__.constructor.call(this, options);
    },

    onShow: function () {
      this._showViews();
    },

    _showViews: function () {
      this._showFormView();
    },

    _showFormView: function() {

      // Use the form view from Form View API doc
      var formOptions = {
        topAlignedLabel: true,
        mode: 'create',
        layoutMode: 'singleCol',
        model: createFormModel()
      };

      function createFormModel() {
        var formSchema;

        // populate form schema

        // Use the literal form schema from the Form Model API doc
        formSchema = {
          id: 'sample_form',
          data: {
            field1: 'Hello world!'
          },
          schema: {
            id: 'sample_form',
            properties: {
              field1: {
                title: 'Greeting',
                type: 'string',
                required: false
              }
            }
          },
          options: {
            fields: {
              field1: {
                label: 'Greeting',
                type: 'd2label'
              }
            }
          }
        };

        return new FormModel(formSchema);
      }

      var formView = new FormView(formOptions);

      // show this form view instead of hello world view
      this.helloworldRegion.show(formView);
    }
  }, {
    enabled: function () {
      return true;
    }
  });

  return MetadataHelloWorldMDView;
});
After making the changes in metadata view, on building the plugin and deploying the plugin on app server, the metadata view should look as in the below image.
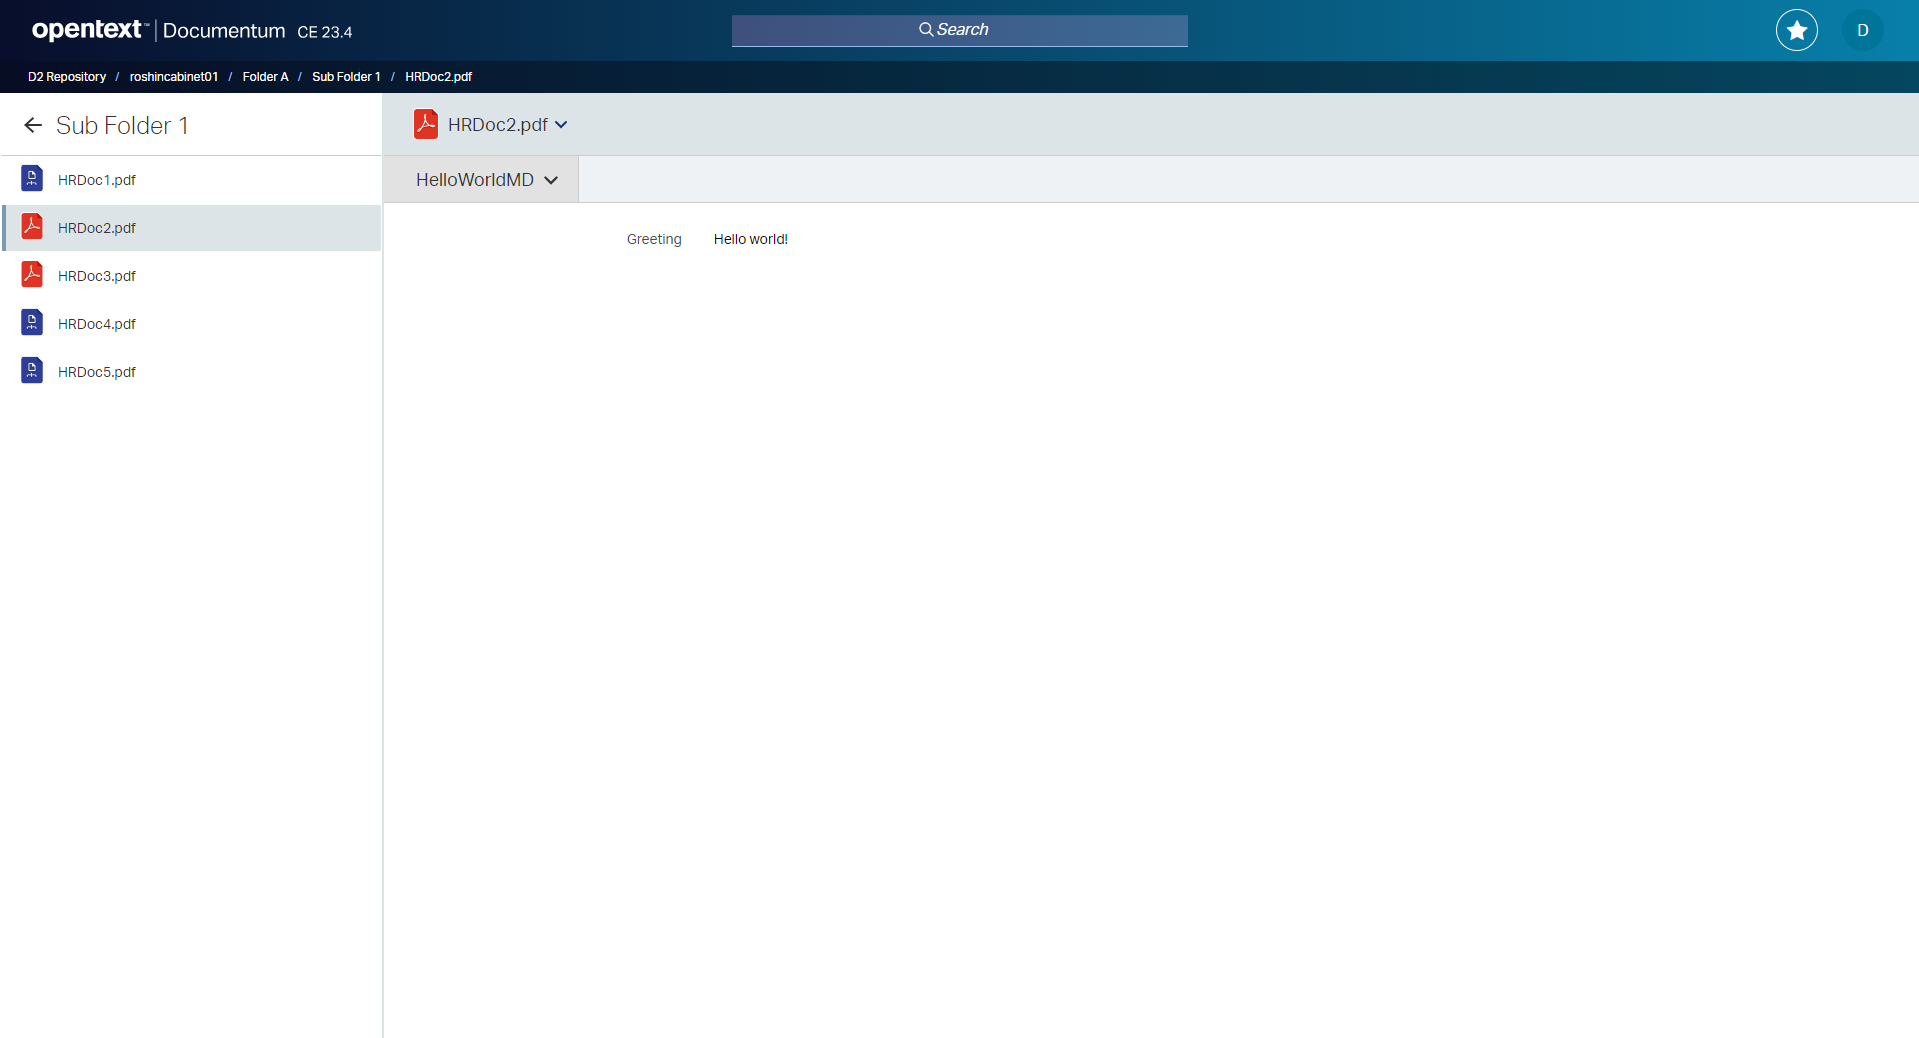
Now go through the sample code above and try to create a simple D2 form and show it in the metadata panel yourself by referring form view, form model and form converter.
Add Task details View
An SDK developer can use the workspace assistant to add task details view to a plugin.
After deploying the plugin, a simple hello world task details view is created and an entry is added to the task details tab panel to open this view.
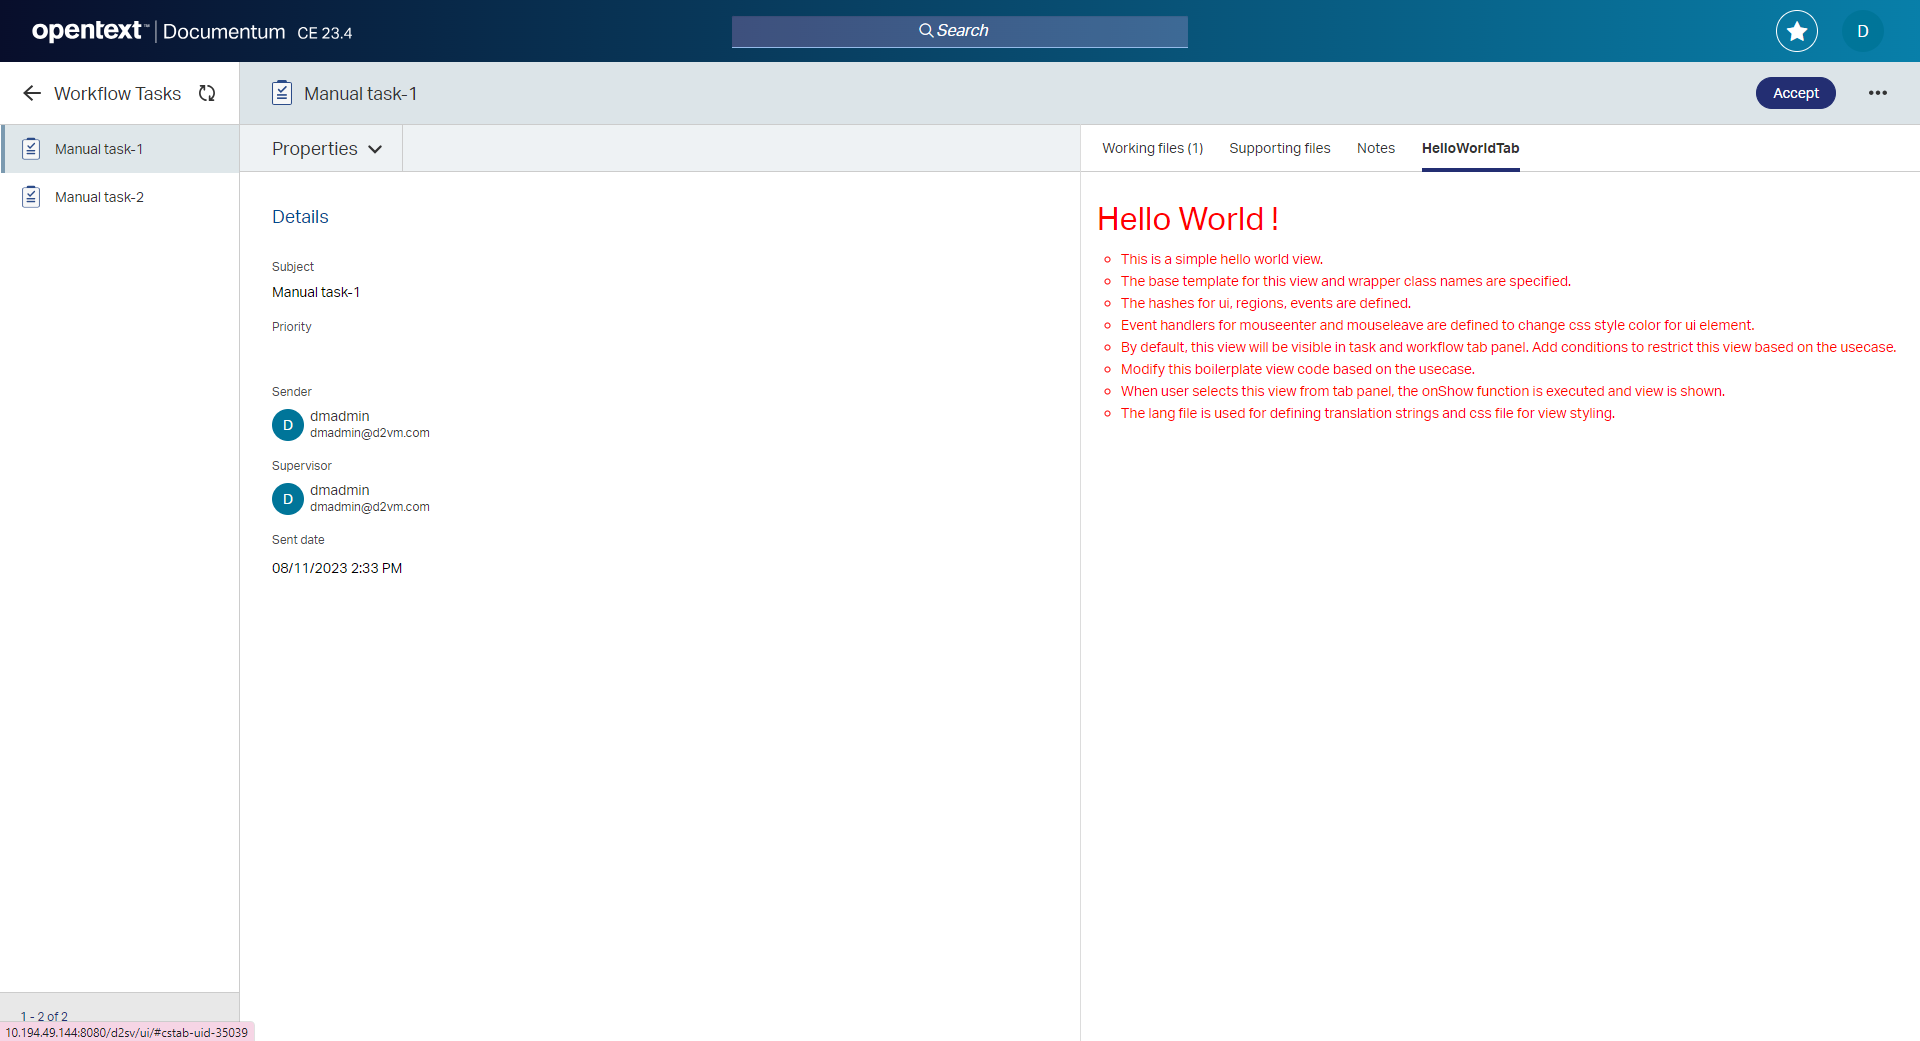
This task details view js file can be modified to show contents based on the use case.
Also, if this view need to be shown/hidden based on certain conditions, this can be done by modifying the
enabled function in the task details view js file.
Let's check the API documentation for the
task details panel view
to see how to modify the enabled function, assign sequence number for task details tab etc.
To Do
By this time, I guess you would have got some idea and starting points for developing a custom plugin and use it in the smartview UI.
You can go through the topics again and try out some simple use cases to begin with.
You can also try out remaining packaged samples and options in workspace assistant.